Photograph of the olive-looking little ones. The process of painting a portrait from a photo of vicorist photoshop. FotoSketcher interface
In this age group, we learn to easily convert photos to little ones with olives, like in black - white options, and in colors with different Smart - filters, coloring balls and overlay modes. We’ll learn how to turn a photo into a black and white sketch and how to save the effect, which I’ll edit again, for the help of Smart filters. Then we know, how to rozfarbuvat little ones for additional color from the outer image.
Lesson of victories in Photoshop CS6, but there will be future versions.
At this lesson, I win the payment of the image.
Otak looks black and white little ones.

The very same effect after adding color to the original photograph.

Let's get it right!
Krok 1. Adding a ball Color tone / Intensity
Upload your photo in Photoshop. On the panel of balls there is a bachimo, that is the only ball.

For the creation of our effect, the first thing that we are to blame is to remove all the colors from our image, without destroying the image itself. For whom on the panel Adjustments(Correction) click on the icon Hue/Saturation(Colourful tone/Intensity).

A new ball will appear above the background ball, what is it? Hue/Saturation(Colourful tone/Intensity).

Krok 2. Znebarvyuemo image
To see the color from the image, just drag the band Saturation(Ability) to a value of -100.

As a result, the image becomes black and white.

On the panel of balls, click on the background ball to select yoga.

Krok 4. Duplicate background ball
We need to create a copy of the background ball. For whom to go to the menu Layer > New > Layer via Copy(Shari - New - Copy to a new ball). Another best way is to use the same keys ctrl+J.

A copy of the background ball appeared on the balls panel.

Krok 5. Inverted image
To invert the created copy of the background ball, go to the menu Image > Adjustments > Invert(Image - Correction - Inversion). Or press the keys Ctrl + I.

The image will look at the negative.

Change the overlay mode for which ball on color dodge(Illumination of the base).

The result of the image will be white. In my mind you see a bunch of small black vineyards - so you can be.

For further work, we need to install Smart - Filter, which does not interfere with the image itself, but is available for editing at any time. For this back of the hand, we need to turn the ball on Smart - Object.
Standing on a duplicate of the background ball, at the top right corner of the panel, press the balls on the menu icon.

Select from the list Convert to Smart Object(Change to Smart - Object).

A smart object icon will appear on the miniature ball in the lower right corner.

In order to set the filter to the ball with a smart object, go to the menu Filter > Blur > Gaussian Blur ( Filter - Rosmittya - Rosemittya Gauss).

At the dialogue window of the filter, what happened, change the value Radius(Radius) to enlarge the image a little. My drop is about 12 px. Customizing your photo may look like mine.

Press OK to stop the installation.
Axis my result.

One of the main problems of adjusting the filter, like the Smart filter, is that if you don’t like the result, then you can adjust the filter at any time. For which you need two, click on the name of the filter, so that you can open the dialog box and adjust the adjustment.

We created the main sketch, and ale vin is also bright and it is necessary to darken the little bits. For whom on the panel Adjustments(Correction) click on the correction icon Levels(Rivni).

Above the ball zі Smart - Object z'appear new ball, scho koriguє.

Krok 10. Change overlay mode
We don’t need parameters for the ball, which corrige, we will use them for locks. To darken our sketch, everything that we need is to change the mode of superimposing this ball on Multiply(Multiple).

This overlay mode is one of the five modes that are most commonly used in Photoshop. And just by choosing the overlay mode, we were able to quickly and easily darken our little ones without changing the parameters of the correction.

If your image is too dark for you, you can change Opacity(Non-transparency) to the ball of koriguvannya Rivnі. I'll put in about 60% for my mood.

Axis scho in me vyyshlo.

At the moment, the main effect of the baby is completed. Let's turn to our little troch color from the original image. For which on the panel of balls select Background ball.
Stylized photographs - the practice of middle-class social media is very popular. There is a great number of devices that allow you to transform a great picture into a watercolor little one, an oil painting or a portrait in the style of Van Gogh. Zagalom variations are too rich.
The procedure has also been expanded - the creation of little olives from photographs. If so, in order to create a picture of a reference artistic masterpiece, it is necessary to carry out cunning manipulations with it in a graphic editor on Photoshop. Such a transformation can be done right in the browser - just for a few clicks on a mouse.
There are few web resources that allow you to easily and simply turn a photo into a little one. For the help of some services, you can stylize a picture with great care, use other tools to make a collage, placing a sign in a third-party image or a frame. We look at the ways of making a little olive from a photograph on the butt of two of the most popular online resources for general purposes.
Method 1: Pho.to
This portal has a wide range of functions for editing images in a browser window. I saw an option here "Photoeffects", which allows you to automatically stylize your photos. The effects are divided into categories, of which the service has a significant number. The style, which is necessary for us, as it is awkward to guess, is known in the rubric "Mystery".

The result of the work of the service is a similar JPG-picture, typified by the style you have chosen. One of the advantages of the resource can be called a great variety of effects: variability can be found at times, it was supposed to be, uniform straightening - a little olive.
Method 2: PhotoFaniya
A popular online service for automatic gluing of some images into other stylizations for more specific details. The pictures here have seen a whole category of effects, as a way to place your photo on a third-party object. Among the tsієї raznomanіtnostі є th kіlka variantіv vykonanyh olіvtsem paintings.
- To turn your photo into little ones, go for more opportunities and choose one of the best effects. For example, "Baby olive"- Simple solution for portrait pictures.

- To go to the image capture on the service, click "Choose a photo".

- At the splicing window, hurry up with the button "Get out of the computer" to import a photo from Explorer.

- See the area of the image for further stylization under the little ones and press "Cut".

- Let's say, how will the bag image be - colored or black-white, and also choose one of the lining options - textured, colored or white. As it is necessary, add a sign to the item "fade edges", to eliminate the effect of fading cordons. Next click on the button "Create".

- The result is not to be embarrassed for a long time. To save the image on the computer, print it "Zavantage" at the upper right corner of the side, which was visible.

The service allows you to create true meaningful pictures, it would be given, nothing remarkable photographs. As the retailers say, the resource can be obtained today over two million images and for such an investment, they will lay a deposit on a new plant without a hitch.
Why can’t people just look at one another, posting photos, for example, on Instagram: sunset on the sea, marvelous creatures close-up, cute couples, etc. And yet one of the biggest problems of the coristuvach of social media is the display of the entire oblique record in one style.
For the solution of this “problem”, on the Internet, there are anonymous programs or sites. Your photographs can easily be turned into paintings, painted in watercolor, olive oil, acrylic, olive oil and in any style - either portraits of Van Gogh, or masterpieces of Chagall.
Often people go along the simple path and transform photographs into the outlines of an olive, with no tricky programs for Photoshop'a. To improve your photo with a wonderful little olive, you can help a special site, knowledge from the search engine.
How to grow little olives from photography
It's not easy to turn a photo into a little olive - you just need to know a web resource that will serve your needs. Maybe you just need to edit a photo to put it in a special blog, or you can create a collage in a frame, in the same style.
In this article, we can look at two options for the accomplishment of this task, having succumbed to such resources as Pho.to and PhotoFaniya.
Option 1: Pho.to
Requesting the site to achieve a wide functionality and, if possible, you can do it right in the browser, without buying paid subscriptions and without downloading additional software. "Photoeffects", divided, necessary for you, giving you the opportunity to automatically select the effect that suits the photo. Tsei razdіl maє podkategorії - on the site Pho.to є there are no options for processing photos. A humming photoeffect, which obviously belongs to a subcategory "Mystery".

Dany service is a good team, that the photo you edited is converted to JPG format and is considered to be of high quality. The site presents a lot of additional photoeffects, which may have some variations. For example, there are options for the effect of a little olive.
Option 2: PhotoFaniya
Denmark's online resource does not accept your photos, but rather paste them, styling them according to the task of sharpening. Effectively, if you can zasosuvat to small ones, here you can see the whole category - and may be all the stinks put your photo on a specific third-party object.
Well, I know, PhotoFaniya hopes that your photo can be "transformed" into a picture, so it can be used in a number of options.

PhotoMania is a very popular service that captures the greatness of today's images. І for such an adventurous hustle and bustle, the hour of processing is minimal.
The site presents a large number of effects, like transforming primary photographs into non-primary frames.
The services reviewed in this article allow you to creatively process a photograph. You can spend a few seconds to see masterpieces, in that hour, as with professional services, or utilities, it was spent a lot more time.
Adobe Photoshop offers a wide range of opportunities for creative processing of photographs. With a photo editor, you can not only improve the frame, but also achieve extraordinary artistic effects.
In any age you know how to grow little ones from photos in Photoshop. As the main tool, we will beat the filter.
For example, let's take the following sign, destruction in Portugal:
And the axis of what we see after our manipulations:

To create little ones from the photo in Photoshop, you can see the sign in the program and create a color ball: Layer / “Spheres” → New Fill Layer / “New Fill Ball” → Solid Color ... / “Color ...”.

At the conversational vіknі we set the color of the paper, on which our little ones will be. You can choose colors of white, gray and sepia.

Then we create a copy of the main ball ( background) and can be adjusted to a new filter Photocopy/Ragged Edges from the set.


The new ball is called "Rough little one". Set overlay mode Multiply / "Multiplication". Here mi іmіtuєmo little ones, like a militia shy before promalovuvannyam details.

Alemits never paint the lines and exact lines the first time. We want to grow up like little ones, and there can be more black lines. To that we create a copy of the ball "Rough little one" and a little more її. Pressing a combination of keys command + T And for the top menu, set the width and height to 105%.

The canvas of the troch will stretch, and the lines of the little one will double. After that, the opacity of the ball is close to 10-20%, so that the lines become more unremarkable, so that the mitets were aiming at that rozmіchav sheet for the distant little one.

Now we are building the same ones, but we are changing the cob web, so that there are more little lines.
Copy ball "Rough little one" and for additional transformation, we change the width and height to 95%. It is possible to set an opacity of 10–20% for this ball.

Now we need to add more graphic effects, so that the stylization will look more like little ones.
Create a copy of the base ball background.

After that, we speed up the filter Cutout/"Application" with a set of filters Filter/“Filter” → Filter Gallery…/“Filter Gallery…”. You can change the filter parameters to your taste or speed up our adjustments.

Drag the styling ball onto the upper part of the ball panel and fix it to the new filter Filter/“Filter” → Stylize/“Stylization” → Find Edges…. Vіn allow to see more strongly the main lines and between objects, like a little one, you can paint better.

Now we can see black-and-white cordoni on the front crochet: Image / “Image” → Adjustments / “Corrections” → Desaturate / “Znebarviti”.

We name the new ball "Eskiz" and set overlay mode color burn. Opacity is regulated.

The front row can be repeated to add more details.
Otzhe, we may have seen from the photograph of growing little ones at Photoshop. At once it is necessary to add a little bit of olive shading.
background and overtight її at the upper part of the panel of balls. Zastosovuemo to the new ball filter Filter/"Filter" → Stylize/"Stylization" → Find Edges…/"View of cordons…".

Now I don't care about yoga.

Speed up the filter Angled Strokes set Brush Strokes on the menu Filter/“Filter” → Filter Gallery…/“Filter Gallery…”.

Vіdreguluєmo dovzhina stroke, directly that detail.
We set the overlay mode to the new ball Multiply / "Multiplication" that opacity is close to 60%. It can be seen that the image has been touched.

Continue to add details. Let's get more strokes.
So the base ball itself is duplicated background, stop filter Crosshatch set Brush Strokes / “Strokes” in the menu Filter / “Filter” → Filter Gallery ... / “Gallery of filters ...”.

I love yoga.

Set overlay mode Multiply / "Multiplication" that regulated opacity.

At this stage, we have already gone to work with photographs of little ones in Photoshop. If your meta is a black-and-white baby, then on whom you can dazzle.

We create one more copy of the base ball background and overtight її at the upper part of the panel of balls. Set overlay mode Color. The little one once "rozfarbuvavsya." Parts of the image have been left behind by mass.

Dodamo to the ball mask by pressing on the pictogram Add Layer Mask / "Add a mask" at the bottom menu on the balls panel. For locking, you will get a mask of a white color, we need to invert it: click on the pictogram of the mask and press the combination of keys command + I.
After which we choose a penzel for vlasny relish. You can either imitate olives, creeds or watercolors from the standard set of Adobe Photoshop or add-on penzles.

We choose a penzle on the masses with a color of small areas, de may buti color. You can experiment with rozmіrom and type of penzl, yogo shіlnіstyu.
We went like this:

For the help of these simple manipulations, we could make photos of little olives at Photoshop. The leather crock is found on a creamy ball, so that it is possible to somehow help or weaken that other effect, to add or clean up the mask for help.
Taking the principle method as a basis, we can guess the algorithm with other filters from the set Filter/“Filter” → Filter Gallery…/“Filter Gallery…” and photoshop photos of little olives.

Good day everyone!
Singingly, mayzhe kozhen koristuvach bachiv near the merezhі "wonderful" photographs of people, instead of the picture, painted by the artist. Such a picture can be called art (the butt of zliva z Nіkulinim). And її її, to the point, you can do it quickly, speeding up with special online services.
I think that the article will also be appropriate for all these coristuvachas, if you want to create your own avatar for social networks (VK, Odnoklassniki and others), various forums, add-ons (for example, Skype, Viber and others), and just invite your friends to relatives.
And so let's proceed to the right - to the creation of art.
Note: to create art, you can speed it up with different graphic editors (for example, Photoshop). I’m not going to use classic editors for these articles (because as long as the editor is installed, nalashtuєsh, zrozumієsh like robiti - for help service in the net, you’ll already have dozens of different cool pictures ☺) ...
Choose a service with the best photo effects
Pho.to
One of the best Russian online services for photographing various effects. For example, a color photograph can be redone:
- in black and white babies, nibi yogo was painted: penzle, olive skinny;
- in colorful babies: there can also be different options;
- I have a cool funny picture. For example, your photo will be placed in a frame, like a child, the artist or else (attach the options shown below).

Using the service is even simpler:
- choose from the beginning the effect that you are worthy of;
- capture your photo;
- and for a few seconds - marvel at your cool art. The butt of the testimony is lower: is it really badly painted?!

How the photo changed: bulo - it became (angry to the right)
photomania.net
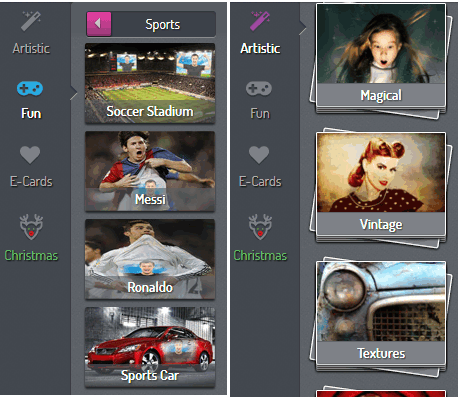
One more site in the region, which is an online photo editor. Here you can take a photograph and make a swedish її: in addition, create cicavius babies from it (art). Chim podkupovuє tsey servіs - on a new one to add a lot of unusual photo editing options: you can, for example, place your photo on the chests of Messi or Ronaldo, put your photo in a frame, give it a magical style, or make yourself a famous actor.
The butt of the testimonies is lower: in my opinion it looks even more realistic ☺.

Another cicavia art // Photomania.net
PhotoFaceFun.com
A site with a large number of different photo effects: here you can put your photo in a frame, paint a photo with a painted picture, put it in the same order as a celebrity, etc.

Using the service is just as easy: capture a photo, choose an effect, marvel at the result (three simple steps).
Below is a link to the application of the robot service. Too bad?!

Dekіlka artіv: at the gallery, with Putin, an old little boy.
Note: if the service does not process your photo, convert it to another format. For example, I'm confused about the fact that the GIF service format should be accepted and not processed, resaving the image in JPG (for which you can change Paint, which is for all versions of Windows)- Started everything is normal!
PhotoFaniya
Dzhe garniy rosiyskomovny service with a great collection of photo-effects, yakі you can win to be-like zavantazhennoy photography. Cho podkupovuє: the choice is simply majestic! A photograph can be made in black and white, painted with a penzle or olive, placed in a frame, with a celebrity, in a TV show, etc.

I’ll make sure that once you capture your photo, you can try yoga in different effects (not capturing yoga a hundred times). Handy!
Apply the outline below.

Another splinter of cіkavih effects before the photo: a little olive, a pendant, a gift leaflet (to the right).
Before the speech, maybe you will have a cikava article about those, how to create a photo collage- . Whatever you don’t know, it’s a collage, if you eat a photo in one bike. It’s even more beautiful to go out, it’s informative, you can immediately recognize how it went sacred (for example).
For what I say goodbye. Good luck everyone!
Additional hovering...


