Manually installing the ADB driver. What is the ADB driver? What is an adb driver for android
Mayzhe kozhen vlasnik Android I will install, who wants to decorate his beloved by replacing the firmware and kernel of the operating system, sticks with the program adb.
For most beginners, this program itself is a complete overkill and we will show you today how to install and start working with this miraculous add-on, which will help you, for example, lose root rights on your device, flash a new version Android Or you can update your phone or tablet up to date after recently entering the system.
So what? A.D.B. which is loved by all modders and hackers, where should we take it and what do we need?
What is ADB?.
Abbreviation A.D.B. stands for Android Debug Bridge(Nalagodzhuvalnyi Mist Android). ADB is a storage unit that can be used zvidsi .
Operating system fragments Androidє variety Linux For this setup, it is often due to the need to work through the command line. Of course, there are programs - terminal simulators, which allow you to enter commands directly on the device, but, first of all, it is not manually possible to work on a small phone screen, and otherwise, sometimes you need access to the device via a computer, and in these cases there is a lot of Other versions of the program adb simply irreplaceable. Program adb establishes a connection between the device and the computer and allows you to perform various manipulations with the system directly on the computer Android.
How to install ADB.
Thank you for everything, we recommend that you download the remaining version, at the time of writing this handbook there is a version available r11, on this application all the following descriptions are required, and in earlier versions, the installation of necessary programs after installation SDK may differ from what is described here.
1. Zavantazhuemo, you can know it for the instructions stated earlier. A bunch of varieties SDK, For Microsoft Windows, Mac OSі Linux.
We will need a variety of varieties for Microsoft Windows. And here there are two options - download the installer or zip archives from the Android SDK. We don’t need the installer, we won’t be allowed to install it anymore SDK V Windows 7, and that’s why we love zip archives.
The archive contains a folder android-sdk-windows, what and take revenge yourself SDK. We unpack it onto your computer. In our case, we placed a folder in the root of drive C. If you do it yourself, go to SDK we will have this: C:\android-sdk-windows
In earlier versions SDK in the middle of this folder in the folder tools the program we needed was expanded adb, but later it was moved by distributors to the folder platform-tools.
However, if you go to this folder, you will not find the program in it adb Then we move on to the next stage of installation.
2.
Installable SDK Platform Tools.
We reconfigure our computer to connect to the Internet and launch the current file that is in the folder android-sdk-windows, program SDK Manager. After launching the program, the following window will appear:
We need to enchant and install Android SDK Platform-toolsі Android SDK Tools.
For more help, click on the item or click on “ Accept"ta" Reject» Select two items from the list and remove the icon from all other items, as shown in the above screenshot. Then we press “ Install"We check while the components we need are downloaded and installed.
Now we have installed adb on our computer, but to work with our phone or tablet, we will need to install its driver and for further usability with the program, it would be wrong to register the paths to it and other components in Windows.
3. If we go to the folder C: android-sdk-windows platform-tools, then now we can display the program there adb.
Therefore, we need to edit the system PATH variable so that every time we start a program and enter commands we do not enter a path to the program that looks like this:
C:\android-sdk-windows\platform-tools\adb
If you have not made any system changes, create a system update point so that you can then turn it into a cob mill.
What do you have installed? Windows 7, right-click on the label “ Computer", select " power" and select " Additional system parameters».
What do you have Windows XP, click with the right mouse button on “ My computer» and then by « Powerful»
For the upcoming week on the deposit " Dodatkovo» press the button « Serious middlings" In the list" System changes» select a change « path" and press the button " Change…»
The option to edit the change will appear, and at item “h” beginning of the meal» at the end of the row, after the dots with which we add the path to the folder tools that dad platform-tools:
;c:\android-sdk-windows\tools;c:\android-sdk-windows\platform-tools;

(If at the end of the row there were no specks with a coma, add them - the skin path in this row is liable to be watered down like another speck with a coma)
Once you have installed it in another folder, write at the end of the row your path to the tool folders and platform-tools.
I will install the drivers for the device.
Devices such as phones and tablets of the company Samsung You need a software program to synchronize with your computer, and if it is installed on your computer, the driver will be installed once installed in your system.
Ale for such devices as Nexus One, which are supplied without any additional software and drivers, for operation with Android SDK, drivers need to be installed.
For whom we go to the folder, we installed it in Yaku SDK and we launch SDK Manager.

Just like we installed it Android SDK Platform-toolsі Android SDK Tools, we know and select from the list “ Google USB Driver package" Onslaught " Install» Check while the program downloads the drivers. Drivers for 32 and 64 bit Windows will be placed in the next folder:
C:\1\android-sdk-windows\extras\google\usb_driver
Now you can install drivers for your device. For this, in the setup menu for your phone or tablet, select the item “ Program" (Applications), and this includes " USB installation"(USB debugging).
We connect our device to the computer. The computer is new and needs to be installed and drivers installed. We install drivers from the folders where they were installed before.
After installing the drivers, a new device will appear in Device Manager. ADB Interface And we can go to it by opening it, pressing the right mouse button on the end. Computer» -> « Powerful» -> « Device Manager»
In addition, you can try installing a universal ADB driver on your computer.
How to launch ADB
Use the program adb best through the command row Windows. To click on the command line on your computer Windows XP, pressing " Start» in the entry field « Viconati» dialing cmd then press “Enter”.
On your computer Windows 7, pressing " Start» type in the input field “Find programs and files” cmd then press “Enter”.
The command row window opens, and in order, for example, to see what devices we have connected to the computer, we type in the command
adb devices.
Program adb A list of devices connected to the computer will be displayed.
If you have a phone or tablet that runs on the Android OS, then, of course, you will want to connect it to your Windows 10 device, for example, to transfer files. Therefore, it is recommended to download ADB drivers for Windows 10 - special libraries of files to simplify the operation of two devices on different OSes.
Features
As a rule, there is no need to install ADB drivers for Windows 10, since all you need to transfer files is. The driver data may be much broader than the following:- Allow transfer of files from the device to the device;
- Take ROOT rights to Android OS;
If the given driver version is not suitable for you, then don’t worry, you can download it later – this is a universal program for automatically searching for and installing any drivers, including ADB.
Don’t be surprised by the fact that the program is absolutely cost-free, it’s even more functional. Russian and English language versions are available. For those who want to instantly install another antivirus program so as not to infect their smartphone, for the sake of vikorism
- Tutorial
And the axis here is not expecting an unpleasant surprise - either the driver turned out to be crooked, or the Windows, or the wire... the driver then got up, the Windows Device Manager reported about the continued usefulness of the device, but not yet. adb devices In the console, I selected the empty list and, therefore, did not test the program on the tablet.
I wrote a request to the TeXeT support service, but sent a message to the driver itself, which I had already downloaded without working. I started searching on the Internet and knew a bunch of different driver assemblies and manuals, but I still needed them without depending on what was required, and downloaded a different driver from the SDK. Chilo mene ... ale ne rozpach.
This is where I decided to try my hand at writing drivers using the good old scientific method and extracting the driver inf file. I was hopeful that the software part of the adb interface on the side of the tablet would be identical for all devices, and USB would work that way. I axis, after many recent attempts at manually correcting the inf-file, I know the recipe for seasoning the inf-file so that it stands out and, smut, works.
Come on, let's see.
Croc 1. Enchant the driver. If you haven't installed it yet, open the Android SDK Manager, find the Extras section, check the Google USB Driver box and click Install Packages. It's simple. Wait until you get attracted.
Step 2. Find the driver and make a copy in a nearby folder. Go to the folder %android-sdk%\extras\google\ and find the dedicated usb_driver folder there. Copy this axis somewhere, and there we will carry out further manipulations. In principle, you can edit the “original”, but I’m important to better preserve the original so that it won’t be borrowed from any firefighter.
Krok 3. Edit inf file. We open the file android_winusb.inf and find rows like this:
;Google Nexus One %SingleAdbInterface% = USB_Install, USB\VID_18D1&PID_0D02 %CompositeAdbInterface% = USB_Install, USB\VID_18D1&PID_0D02&MI_01 %SingleAdbInterface% = USB_Install, USB\VID l, USB\VID_18D1&PID_4E12&MI_01
We take a copy of these rows and replace them Google Nexus One on %im_your_device% To identify yourself in the latest version, open the Windows Device Manager. Looks like our device is there( Android, Android Composite ADB Interface Whose style is it?) Open the power device, the “Views” tab, select the “Ownership ID” item from the list and select the following picture.
We copy the row that is most similar to the one shown in the baby (the idea is just a little shorter), and paste it into our inf-file.
;TEXET TM-7025 %SingleAdbInterface% = USB_Install, USB\VID_18D1&PID_0003 %CompositeAdbInterface% = USB_Install, USB\VID_18D1&PID_0003&MI_01 %SingleAdbInterface% = USB_Install USB_Install, USB\VID_18D1&PID_0003&MI_0 1
In %SingleAdbInterface% the end of the row is removed, obviously, in %CompositeAdbInterface% it is inserted directly. There’s no need to repeat everything in a melodic manner, but I’m already good at everything and less lazy to experiment :)
Saved (be careful - in some cases you will need to run Notepad with administrator rights, because in the user mode you will not be allowed to overwrite the inf file).
Croc 4. Installing the driver. Now, if everything is prepared, let’s go to the Device Manager and delete all previously installed adb drivers (eg Boolean). We are updating the list of devices and also our device without drivers. We open our system and select “update drivers”, select the installation from the folder, select the folder with the corrected information and start the installation - our driver will be instantly found, otherwise, if the driver is installed, you can bark about the insanity of the power supply “and continue Nasalneka? Let's continue. That's it, the driver is installed.
Krok 5. Final. For accuracy, carefully plug in the USB port, check until everything appears, open the console (Win + R, enter cmd) and we write adb devices. If everything went well - this is the most important item on the list, which means that adb is now downloading our device. 
From now on, you can safely launch eclipse and other programs, enjoying manual automatic assembly, installation and debugging capabilities directly on your device.
The adb command does not work. Computer -> Powerful -> Evil Middle. Let's look at the changeable Path and things like that adding(every time it is not overwritten) at the end there is a dot with a coma, and after the folder address, where adb lives (name %android-sdk%\platform-tools\). After re-engagement, you can request.
The adb node does not start automatically when the system starts. Launch manually.
What was it all about?
In fact, everything is simple. For some reason (Winda is installed / you have crooked hands / the Google info file was written only for some Google devices / your computer has all the Higgs bosons) Windows does not want to have a Google driver for non-Google devices any devices not recorded in inf-. Perhaps, everything there is tied to the ID-possession process. However, the software part on most Android devices in terms of the debugger connector to the PC is identical, so the driver must integrate normally with any Android device. Our goal is to fool Windows and mistake the device for a driver-specific device, which we have created by adding this drive to the driver inf file.
I’m sure that this manual will help anyone get their Chinese or other device, for which they forgot to create a normal adb driver when the system was folded, or those who need to download the official driver from the device’s driver (this happens on the hemorrhoids, which is more take advantage of all the descriptions - that’s how it is for me came with driver for LG E510).
PS I have not carried out mass testing of this method, so I cannot guarantee that you will earn 100% in all cases. I first requested it on Windows 7, and then on Windows 8. I had to edit the file every time, but I don’t think it’s a problem.
The ADB and Fastboot utilities are included in the Android SDK development kit (you should not confuse Android Studio and therefore rely on its bulky installation file, since you, of course, do not intend to develop it under Android). ADB is a development tool that allows you to gain access to the Android console from your computer () by connecting the gadget to your PC via USB. At this point, there is a problem. Fastboot is used for working with the device, if it is installed in single-mode mode (as is the case on your device).
With the additional help of ADB, you can manage your smartphone/tablet from your computer: create a backup of your files, record a screencast, put your smartphone in Recovery mode and much more. In addition, ADB can be used via Wi-Fi. For this purpose, your device will need to be denied root rights, and you will also need a special program that can connect to your computer at the same time. For example, ADB Wireless and WiFi ADB. Ale is already the material of a real article.
Using Fastboot, you can perform custom recovery (or otherwise), unblock Bootloader (on HTC, Motorola, Sony, Nexus, Huawei devices, other LG devices that are not blocked), and clean up parts of the system.
How to install ADB and Fastboot: instructions
1. Go to the official website, you can download the Android SDK: https://developer.android.com/studio/index.html. Scroll down to the Command line tools only section and select archives for Windows.

2. Check the “I have read and agree with the above terms and conditions” checkbox and click the “Download Android Command Line Tools for Windows” button. The archive seems to be fascinated.

3. Download it and unzip it to the root of Disk “C:”.
4. It is also necessary to download the Java Development Kit from the official website. Go to the site, agree to the license agreement by checking the “Accept License Agreement” clause, and download the version of the JDK that corresponds to the capacity of your system.

First method
Go to the Android SDK folder, open “tools” and launch “android”.

Select "Android SDK Platform-tools" (and also "Google USB driver" if you have a Nexus device) and click "Install Packages".

Read below about installing drivers for other devices.
Select “Accept License” and click “Install”.

My log showed that the settlement was canceled. Ale vreshti-resht everything ended successfully.

After completing the video descriptions of the actions of the father “sdk-tools-windows- version“platform-tools” will appear, and it will contain “ADB” and “Fastboot”, which will taunt us.


Another way
Go to the folder “sdk-tools-windows- version» → “tools” → “bin” and, pressing the Shift key, click the right mouse button on the empty area. Select “Open Command Window” or “Open PowerShell Window Here” if you have one of the remaining Windows 10 builds installed on your computer or laptop.

Paste the command into PowerShell or the command row (in PowerShell add /cob):

Press “Enter” to exit the command. Files will be downloaded and you will be prompted to install:

To enable, enter y for yes and press Enter to begin installing platform-tools.

At the end of the command line, a notification will appear that the procedure was completed successfully. And the "platform-tools" folder with ADB and Fastboot in the middle will appear in "sdk-tools-windows- version».
(!) If for some reason you cannot install ADB and Fastboot using the previous methods, try the third option - just download the platform-tools archive and unzip it to the C: drive.
Installation of ADB and Fastboot drivers for Windows
If you have a computer, smartphone or tablet, you need to install the USB driver:
- Samsung - the driver is included in the Kies utility warehouse: http://www.samsung.com/ru/support/usefulsoftware/KIES/ or you can download it additionally by selecting the required model: http://www.samsung.com/us/ support /downloads
- HTC - in stock HTC Sync Manager: http://www.htc.com/ua/software/htc-sync-manager/
- Nexus – the Android driver is installed at once from the Android SDK, as described above.
- Huawei – complete with the HiSuite utility: http://consumer.huawei.com/minisite/HiSuite_en/index.html
- LG – install LG PC Suite: http://www.lg.com/ua/support/software-firmware
- Motorola – watch this page: https://motorola-global-portal.custhelp.com/app/answers/detail/a_id/88481
- Sony Xperia – FastBoot drivers for all models can be found here: http://developer.sonymobile.com/downloads/drivers/
- Xiaomi – Mi PC Suite: http://pcsuite.mi.com
- MTK – for Chinese devices on MediaTek chips: http://online.mediatek.com/Public%20Documents/MTK_Android_USB_Driver.zip
- Lenovo – select the model of your smartphone, tablet and download the ADB driver: http://support.lenovo.com/us/en/GlobalProductSelector
- Find solutions for devices from other manufacturers on official websites.
There are various universal ADB driver installers (for example, this one: http://adbdriver.com/downloads/) - you can also use them, for example, if for some reason you cannot establish an official solution.
If you get a driver for your model without an installer, you may encounter the following:
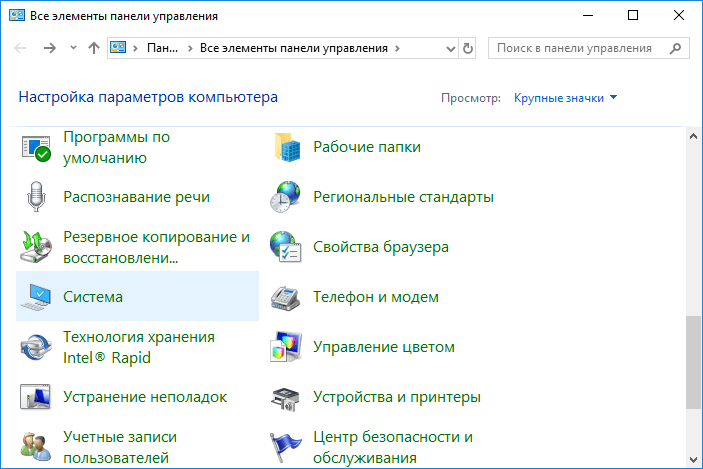
1. Go to the heating panel → Device Manager. In Windows 10, all you need to do is right-click the bear on the Start menu and select Device Manager.

2. Find the device in the list for which you need to install drivers. Right-click and click “Update drivers”.

As you can see, the computer correctly recognizes my Nexus 7 tablet. If your PC recognizes the smartphone incorrectly or, on the contrary, the device has a familiar name in the middle, “manually” installing Android drivers is a burden for you.
3. Select “Find drivers for your computer.”

4. Select the path to the folder with drivers on your computer.

Wait until the installation is complete, and then reconnect the gadget to your computer via USB.
How to start using Fastboot and ADB
Working with ADB or Fastboot can be done from the command line; utilities can be launched in two ways:
1: Right-click on “Start” and select Command Row (Administrator) or “Windows PowerShell (Administrator)”. Next, using additional commands, enter the path to the folder with ADB and Fastboot (after entering the “Enter” skin button).
Go to the root of the C:\ drive and wiki:
This command will open the required folder:
My guess turned out like this:
cd\tools_ version-windows\platform-tools

You will see (Google developers changed the name of the archive after writing the final version of this instruction):
cd\sdk-tools-windows- version\platform-tools
Go to Fastboot and ADB instructions, now let’s work with them from the console.
To avoid losing this too soon, add paths to “platform-tools” under the “Path” menu. First go to the folder, in the navigation row, right-click on “platform-tools” and select “Copy to address”.

Go to the ceramic panel. To do this, press “Win” + “R” and insert control in the “Open:” field. Click "OK".

Select “System” → “Additional system parameters” → “Changes.”


Find the changed “Path”, see it and select “Change...”.

Click the “Create” button, paste to the “platform-tools” folder and click the “OK” button.

Android Debug Bridge (ADB) It is a console program that allows you to control a wide range of functions of mobile devices that run on the Android operating system. The main purpose of ADB is to enable convenient operations with Android devices.
Android Debug Bridge is a program that follows the principle of " client-server" The first launch of ADB using any commands is strictly supported by the server’s buildings in the form of a system service called a “daemon”. This service continuously listens to port 5037 in the active command.
Since the program is a console program, all functions operate by entering commands with the same syntax in the command line Windows (cmd).

The functionality of this tool is available on most Android devices. The culprit may be that the device is blocked by the device due to the possibility of such manipulations, or other than the failure.
For the primary user, the installation of Android Debug Bridge commands, in most cases, becomes necessary when the Android device has updated firmware.
Vikoristan's butt. Review of connected devices
All functionality of the program is activated after entering the song command. As an example, let’s look at the command that allows you to review the device’s connections and check the readiness of the device before receiving commands/files. For whom the command is given:
adb devicesThe system response to this command is two-variant. If the device is not connected or not recognized (the driver is not installed, the device is in a mode that does not support work via ADB, etc.) the device rejects the “ device attached"(1). In another option - if there is a device connected and ready for further operation, its serial number is displayed in the console (2).

Variety of possibilities
The list of possibilities that you can expect from the Android Debug Bridge tool is wide. To access the commands on the device again, you need to be present superkoristuvac rights (root-rights) And only after their removal can we talk about unlocking the potential of ADB as a tool for improving Android devices.
It is important to note that the Android Debug Bridge has a kind of subsystem. To be more precise, there is a list of commands with a description of the syntax that is output as a response to the command:
adb help
This solution often helps rich users to remember the forgotten command to call this or another function or it is spelled correctly.
Advantages
- A cost-free tool that allows you to manipulate the Android program, available to users of most devices.
Nedoliky
- Availability of the Russian version;
- A console program that relies on knowledge of command syntax.
A.D.B. Entertain without cost
Android Debug Bridge is an unknown part of the toolkit designed for Android developers (Android SDK). Android SDK tools, in their own way, are included in the Android Studio component kit. The creation of the Android SDK for all purposes is available to all business owners absolutely without cost. For this purpose you only need to go to the page of interest on the official website of the Google company.


