Copying and moving fragments of the image from the graphic editor Kolour Paint. Moving and copying objects How to copy an image in paint
The first step is to look at a fragment of the image, it is necessary to see it.
Fragment seen
A fragment of the image is seen behind the help of the "Vision" tool (figurative or straight-cut knives).
There is a dotted frame next to the seen fragment:
If you didn’t get far enough to look correctly, click on the mouse in the same area of the screen and repeat.

How to choose a tool Panel Fitting:
Copying with transparent background 
Copying with an opaque background 
It is also possible to set transparency at the menu of Littles. 
Just click on the right mouse button over the visible fragment, to appear context menu, in which you can choose a command
With a fragment of the image, you can see the following
Clear;
Move to the next month;
Change something;
Copy;
Multiply;
Imagine chi turn to the kut; 
Stretch chi nahity perceptibly horizontal chi vertical axis;
Turn the colors (to change the colors on the stretch).
Fragment relocation:
Place the cursor of the mouse in the middle of the displayed fragment, with the left button of the mouse, place the fragment in the required space.
Copying a fragment: 
1st way - insert the mouse cursor in the middle of the rendered fragment, move the little ones by pressing the Ctrl key;
2 way - see the fragment, copy to the clipboard (Edit, Copy or Ctrl + C), paste from the clipboard (Edit, Paste or Ctrl + V).
From the clipboard, the little ones are always inserted at the top left corner of the screen. Copies can be inserted like a current baby, so in another baby.
Zavdannya "Periphery"

1. Open the file "tiny\periphery.bmp" and rotate it.
2. Start another Paint. Set the size of the arch 800x600. Save the file under the name "5-periphery.bmp"
3. Divide the sheet into two equal parts - draw a horizontal line. At the upper part of the accommodation, you will have an addition to the introduction, at the bottom - an extension of the introduction.
4. Go to the little “periphery.bmp” (behind the help panel, back, at the bottom of the screen), see one of the attachments, copy it to the clipboard, go to “5-periphery.bmp”, paste, move either to the top, or to bottom part.
5. Fill in with pictures. Save file.
Task "Portrait of a lover of a boa constrictor"


1. Open the file "baby\boa.bmp" and rotate it.
2. Start another Paint. Install the size of the arch 270x400. Save the file under the name "5-string.bmp"
3. Paint a photo frame (white color - background color)
4. View it, copy it to the clipboard, go to "bmp.bmp" and paste it.
5. Move the frame in such a way that a boa constrictor's head is at the center (background - prozory).
6. See the frame (already with the head), copy to the clipboard, go to "5-bmp" and paste.
7. Save the file.
Fragment reproduction:
Move the little ones by pressing the Shift key. A handful of copies, taken away from one’s own, to lie in cash, with which the bear moves  (3 cola)
 (Z blizzard)
Change rozmir:
1st way - see the fragment, move the side or cut marker of the view (the cursor of the mouse is responsible for the shape of the hinged arrow);
2nd way - menu Picture, command Stretch/Healthy, set a new size for windows.
If the expansion can increase, then the numbers can be larger than 100, change - smaller than 100.
If the numbers are the same, then the little ones will change proportionally, if they are different, then the little ones will become greater / lower or thinner / thicker. 

Show and turn:
The entire small or visionary fragment can be displayed (from top to bottom or left-handed) and rotated 90, 180, 270 degrees. (Baby menu)

 - Vibration is angry to the right,
 - beast down
 turn 90,
  turn 180
  turn 270
Nahility

For an additional command, you can specify in degrees a sickly seen fragment or a small one.
 healed horizontally by 30 degrees
 vertically by 30 degrees
For example, I’ll prepare a vicarious bush of algae  , for additional care, you can take out different forms for an aquarium and a sea landscape

Headquarters "Meteliki"
1. Launch Paint. Paint a blizzard.
2. On the back of the head, paint all the fragments to it: 
3. Copy and rotate the parts of the krill, wusik. 
4. Take one wing, then another, then put a charge on them, place a body between them, put a whiskey.
5. Sweep with a blizzard of all operations - moving, copying, multiplying, increasing, changing, expanding, turning, stretching, fraying, adding colors.
5) What tools did you use to paint objects from the "Lis" plant?
6) How did you beat the fox for the possession?
7) What are the commands for copying and multiplying?
8) What needs to be done so that the image is thrown down?
9) What needs to be done to change the image?
10) What needs to be done so that the image turns left-handed?
11) What kind of color scheme is white, yellow, red?
How to open a tab with the most accessible actions, how you can work with the Paint robots created. On the side Tools on the Paint panel We looked at the possibilities of the main Paint tools.
On this side I will tell you -
How to work with images in Paint.
How to visualize the visions of the object
and paste yoga in another image
The tool "Virizati" on the Paint panel, the meanings of the number 3.
On the butt of two images, I will show how to visualize the object
From one image, paste the object into another image.
Є two images - Novorichna Yalinka and a symbol of 2012 rock, a funny dragon.
Offending the image in PNG format.


I changed the size of the image with a dragon in a smaller background horizontally
and vertical - by 50%. Wiishlo image of such a rozmіru.

Then I turned back to the Vidility tool.

І took away - "Dovolna region" and "Vision of vision."
She made the vision look like a dragon and clicked with the Virizati instrument.
The dragon has spent up to the clipboard, and on the image, de bouve the dragon, only the background has been stripped.

Then I opened the image with a link and pressed it onto the “Insert” tool.
The dragon appeared at the left upper codend image with yalinka i just
I pulled yoga (with a pressed left bear) at my place.
І axis is the result of tsієї roboti.

Yakshcho zrobiti qiu work in Adobe Photoshop, then the image is in PNG format
take care of a transparent background, so there is no white background and the image looks like this.

And in Paint programs transparency to the background is used and when saving
images in PNG format - the program installs such a message.

Ale, I need to show you - like myself in Paint, visualize the object
From one image, paste yoga into another image.
How Paint displays images vertically or horizontally
How Paint renders an image
vertically or horizontally
In order to display the image vertically or horizontally, you need to open the need an image in the Paint program. I am calling vikoristovuvatima, for clarification, an image with red currants.

Like bachite on the image - grass at the bottom of growth, like to lay down, uphill,
and a thunderous red currant descends from the needles down and the crest stretches out
upper right side. We display the image vertically.
and selectable from the "Display vertically" tab.

Bachite, after that, as the image was depicted vertically, the image essentially flipped 180 °. The grass is uphill, and the black currant, like a chicklet, stretches up the hill. So not all images need to be displayed vertically, but I explained the principle of vertical image display, but it is clearly visible on the image.
And now the image is displayed horizontally.
For which one press the “Rotate” button on the panel at the “Image” section
and selectable from the "Display horizontally" tab.

I bachimo that the image has turned.
The ridge is now stretching from the upper left side.
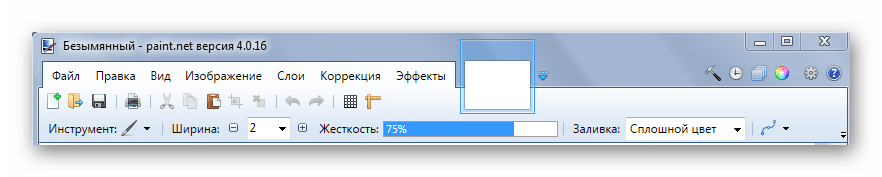
Paint.NET is simple for everyone. Let go of the tools, and let them surround you, but allow you to create a series of tasks for an hour of work from images.
Paint.NET window, main work area, main panel, which includes:
- tabs with the main functions of the graphic editor;
- often vikoristovuvanі dії (create, save, virіzati, copy and іn.);
- parameters of the selected tool.
You can also add additional panels:
- tools;
- magazine;
- Shari;
- palette.
For whom it is necessary to activate active icons.

Now let's look at the main things that you can work with the Paint.NET program.
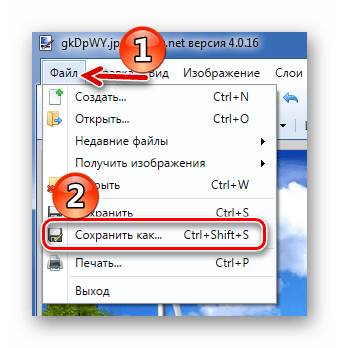
The creation of that visual image
Open tab "File" and click for the required option.

Similar buttons are placed on the working panel:

When opening, it is necessary to select an image on the hard disk, and when closed, it will appear in the window, where it is necessary to set the parameters of the new image and press "OK".

To restore respect, that you can change the world of the image, be it a mistress.
Basic image manipulation
In the process of editing an image, you can visually enlarge, change, revise for the size of the image, or rotate it. real world. Rob tse through the tab "Vigliad".

Abo for the help of a buzzard at the bottom of the vіkna.

Contributors "image"є everything is necessary, to change the size of the picture and the canvas, as well as to robiti її coup chi turn.

Be-yakі dії you can skasovuvat and turn through "Edit".

Abo for additional buttons on the panel:

Seen that clipping
To see the singing area of the picture, 4 tools were transferred:
- "Selection of rectocut area";
- "Selection of oval (round) shape";
- "Lasso"- allows you to fill up a full area, circling її behind the contour;
- "Charm stick"– automatically creasing the surroundings of the objects on the image.
The leather version of the vision is practiced in different modes, for example, adding or visualizing the vision.

To see all the images, press CTRL+A.
Farther away, vikonuvatimutsya without intermediary schodo seen area. Via tab "Edit" you can look, copy and paste the video. Here you can visualize the area, visualize the fill, invert the visualization, or scatter yoga.
Deyakі _instrumenti vinesіn_ on the working panel. The button has been removed "Currently seen", after the pressure on the yak, only the area is visible in the image.

In order to move a visible area, Paint.NET is a special tool.

Competently vikoristovuyuchi tools and seeing that circumcision, you can work background on the pictures.
Painting and pouring
For painting, recognized tools "Penzlik", "Olivets"і "Bowing brush".
Pratsyyuchi s "Penzlem" You can change the width, thickness and fill type. To choose a color, vicorist the panel "Palette". To apply the little one, press the left button of the mouse and move it "Penzlik" along the canvas.

Pressing the button to the right "Palettes".

Before speech, main color "Palettes" can be similar to the color of the flowing little dots. For whom just wrap a tool "Pipetka" and press the place, the stars need to copy the colors.

"Olivets" maє fixings rozmir 1px that possibility is improved "Overlay Modes". In another way, it is similar "Penzli".

"Bowing brush" allows you to select a point on the picture ( Ctrl+LMB) that vikoristovuvati її as a guide for drawing a little one in the other region.

For help "Fills" you can shvidko zafarbuvat okremі elements of the image let's show the color. Crimea type "Fills", it is important to correctly instill її sensitivity, lower the zayvі area.

For clarity, you need objects to sound, you see, that buv is poured.
Text and figures
To write on the image, select the appropriate tool, specify the font parameters and color "Palettes". After that, press on the need for space and repair the introduction.

When applying a straight line, you can specify the width, style (arrow, dotted line, thin line), as well as the type of fill. Kolir, as a rule, is chosen in "Palettes".

If you pull on the bright spots on the line, then it will bend.

Figures are inserted in a similar manner to Paint.NET. The type is selected on the toolbar. For additional markers along the edges of the figure, the size and proportions change.

Give respect to the cross with a figure. With this help, you can tighten the inserted objects in every little way. Why should the text be that line.

Correction and effect
Contributors "Correction" to know all the necessary tools for changing the tone of color, brightness, contrast, etc.

Vіdpovіdno at the contributor "Effecti" You can choose one of the filters for your image, which are used by most other graphic editors.

Image saving
If you have finished the work in Paint.NET, do not forget to save the picture. For which one open the tab "File" and press "Save".

Or hurry up with a pictogram on the working panel.

The image is saved there, the stars were out of the blue. And why old version will be removed.
In order to set the parameters of the file on your own and do not change the dzherelo, use the "Save the Yak".
You can choose the area to save, enter the image format of that name.

The principle of work in Paint.NET is similar to that of most modern graphic editors, but there is no such abundance of tools and it is much easier to develop. That's why Paint.NET is a bad option for beginners.


