Transferring windows to a new SSD. How to transfer Windows system from HDD to SSD drive! Preparing the SSD for image freezing
And then we will renew them with the pure Windows installations. I'm wondering if there are people who want to transfer a heavily polished system from one disk to another. On the back of my mind, I did not plan this record, but took off the cherished food in good order, virіshiv visvitliti tsey clumsy process at the blozі.
For disk cloning special programs(for example, Acronis or Paragon). The stench of a marketing trick often tries itself to transfer the system from HDD to SSD, as in the title of this helper :) do without unacceptable failures, moreover, my instructions are fixed before be-yakim disk types.
I would like an endorsement that my helper describes the process of cloning the system and transferring it to another disk within the same PC. Transferring the system to a different PC (using the same hardware configuration) is recommended only for images that are related to the additional sysprep utility. Formally, Microsoft does not support cloning without sysprep (bring it to a third-party software). At the method proposed by me to improve the transition to a small number of technical facilities, but I don’t respect them for home PCs.
Today at the program
You need to know...
Let's take a look at the terminology. There, de vi bachite the phrase "setting the disk", " Windows disk PE”, “Innovation disk”, with equal success you can burn both an optical disk (CD / DVD) and a USB disk (flash drive).
Otzhe, you need:
- The middle of the be-yakіy form. You can use:
- Windows installation disk
- the middle of the notification on the disk of the notification that informs the operating system (special instructions for Windows 7 or Windows 8 and beyond)
- creations disk Windows PE 3.1 or 4.0
Why imagex and de get the utility
With the release of Windows 8, the imagex utility has fallen into obsolete status, and Microsoft now recommends the DISM win. However, imagex works and is still supported, in that case for DISM you need to create an exciting Windows PE disk with .NET Framework and PowerShell, which makes the process easier.
Yakshcho vyddaєte perevaga graphical interface, є Gimagex, but I'm trying not to add third-party factors to the process of opening the OS. The imagex utility can be enabled within the ADK by setting just soobi laryngeal total is about 50MB (thanks, Semyon Galkin). Once installed, you will find imagex in Program Files (x86)\Windows Kits.

Alternate and other ways - you can apply for the utility by mail from Microsoft by requesting the statistic knowledge base KB2525084.
Storage of the system partition in the WIM image
Get started in Windows PE and type in all the commands in the console. In order to change the size of the image, at the hour of storage, the files for deep sleep, as well as the cat and shadow copies, are automatically turned on. If you want to disable other folders or files, create an imagex config file. You'll need to know the name of the language, because you'll win the Windows Subsystem for Linux ( WSL) for Windows 10 - for Vinya, you need to add the folder %LOCALAPPDATA%\lxss (div. also KB3179598).
Parameter command line /compress maximum you can change the image a little. I don’t use vicorist, because the maximum pressure will drag out the process, and I have no problems with a free space for saving the file.
After the procedure is completed, disconnect the PC and connect the SSD to the HDD space. A hard drive can be connected to another socket.
Preparing the SSD for image freezing
The task is to open a new distribution in Windows PE. For an SSD, it is important to correct the change to allow for reduced productivity and a short term storage service. The installer automatically sets the default to 1024KB, which makes it easy to switch. The hour of creation of distributions on a blank disk diskpart utility the same, but in my commands, the shift is set explicitly, so that there are no differences.
Here is the minimum set of extensions, which is suitable for all Windows supports ( split Windows RE does not create). Sequentially, in the Windows PE console, hover the commands below. The stench may be on the verge, that the SSD will have one main partition created, which takes up the entire disk.
Diskpart:: list disks list disk:: select disk (replace N, enter SSD letter) sel disk N:: clean disk into partitions (remove all data) clean:: convert disk from MBR convert mbr:: create main partition with 1024KB create partition primary align=1024:: partition primary align=1024:: partition primary align=1024:: partition primary align=1024:: partition primary align=1024:: partition primary align=1024:: partition primary align=1024:: partition primary align=1024:: partition primary align=1024:: partition primary align=1024:: partition primary align=1024:: partition primary align=1024:: format partition primary align=1024:: partition primary align=1024:: partition primary assign letter=W exit
Now everything is ready to save the image to the SSD.
Zastosuvannya image to SSD
This operation is completed in Windows PE with one command:
Imagex /apply E:\migrate.wim 1 W:
- E:\migrate.wim way to a saved image
- 1 - index of a single image in the WIM file you created
- W- SSD drive letter for Windows PE, recognized troch earlier for diskpart
Your letters can revitalize, obviously.
Improving the advancement to a cloned system
MBR markup
Utility bootrec available in Windows PE when enabled installation disk but you can’t enter before the chosen one you Windows PE disk.
bootrec/rebuildbcd
Whoa team is joking installed Windows on all disks (equivalent to the /scanos parameter) and prompts to add to the BCD of the daily system. The pressure of the Y button adds OS to the interest, and N - pushes the proposition.
Also maє sens odrazu vikonati sche two commands:
bootrec /fixmbr bootrec /fixboot
GPT markup
For GPT expansion, the files necessary for the capture of the system are copied to the EFI partition (FAT32) with one command:
bcdboot W:\Windows
Here W is the drive letter, the OS was transferred to Yaku.
Whom has the transfer process completed. After restarting the PC, you can check the list of the system manager, you have transferred it to the SSD.
What is the work, what is the hour of the creation of the image, the disks are offended, the disks are connected
I’m more ahead of it, better than that, don’t be robiti. In this case, in the cloning system, the letters of the disks are confused, although it doesn’t matter to correct them in the registry (such a read for Artem for the addition). The axis of the yak picture is posterized after the acquisition in the cloned OS. The system is captured from the D drive, and the program profiles are launched from the C drive.
To fix it, it's necessary change drive letters in registry. In fact, it is required to remember the letters in the names of the parameters in the registry, which correspond to the problem disks (the value of the number is not required).

Whose butt needs to be replaced \DosDevices\C: in \DosDevices\K:, after which the name of the rename of the D drive is called.
Follow after cloning
Check Windows Productivity Score
Vikonannya assessments of the system that it is installed on solid-state accumulator. As a last resort, Windows zastosuє vіdpovіdnі nаshtuvannya - vіdpravlenie z vіdpravleniya TRIM commands and іnіnchuyuchi vіmknennіm defragmentії SSD ( obov'yazkove silannіa vlasnikіv Windows 8).
Set up an interest dispatcher
I can't transfer all possible multi-capture configurations, but someday after the process is completed, you will have two systems with the same names (old and new) at the capture dispatcher. I will bring a few examples of commands, which may be good for you.
Information about the systems that are displayed on the screen of the dispatcher, enter the command bcdedit. In the results, the system identifier (ID) is indicated by the parameter identifier. System, in the Yaku you are taken advantage of at once, enter the maє іdidentificator (current).
At these butts, they are on the uvazi, so command them to snuggle in new systems.
Rename new system entry
bcdedit /set (current) description "My New Windows"
Bcdedit /default (current)
Viewing the record of the old system
Bcdedit/deleteID
If you do not dare to get into a cloned system, otherwise you will need additional help in setting up an advance dispatcher, write here, dotrimuyuchis rules those.
Discussion and experience
From previous experiences, I know that more readers have already removed SSDs. Tse experimentation will show how you came up with the power of installing the system on a new accumulator.
If you have transferred the system, write in the comments, if you have programmed the software for whom. I know that someone has already told about it in other records. Ale todi tse buv offtopic, but at the same time help other readers, who is looking for information on the topic!
Good day or good evening, dear friends, you know, readers are fast and no less, and other specialties. Today, we have long requested a bagatma, judging by your listings, the topic.
At this article (I’m sure I won’t grow into a sprat of parts, which will be understood by your comments) I want to tell you about those, how you can comfortably move to an SSD, I’m sure, nothing, let’s say, 60 GB without reinstalling the system that її readjustment from scratch. Well, otherwise just move from disk to disk.
What is required for Windows porting
How about a small advance, more, as it seems: " Advances mean omissions".
Note:
I’ll please you from these statistics, you follow your fear and risk, more than an hour best solutions buvaє just reinstalling everything and everything. Vtіm, yakshcho work all for the instruction, it's not the fault of the problems.
Also, if everyone is up to date, you can go to the list of software security/ownership that we need (I can’t help explaining how to put it on the SSD storage, saying, what the stink of swedes and so on). our small note: "".
Vtim, to the point. Let's simulate the situation: You have an SSD with a capacity of 60 GB and a HDD with a capacity of, say, 500 GB, some division into volumes (one of those system ones) and you will need to switch to an SSD without reinstalling the system.
Let's wonder what is necessary for whom.
From a zalizyak we need:
- The SSD itself is accumulating. AT this butt, - tse KINGSTON SV300S37A60G with a capacity of 60 GB;
- If there is any other storage device, it should be more than 60 GB (you can take a 64 GB USB flash drive). Wine is consumed, to grow on a new one backup copy systems back to the її original version, and then later to the ("repaired") one, in which it will be after the completion of our random algorithm;
From the software we need:
- Acronis True Image Home (for example, 2013) is the main tool for us, as we can do our best to look at the backup copy of the system. Ahead of the Wiguki about not being free this tool, I want to request a 30-day trial version to help you. I am extremely aware that Rome is not for a month of inspiration, but for 30 days it’s not only for our entire algorithm, but also for creation zavantazhuvalny disk(which to us, before the speech, is simply necessary, especially as we have nothing under the hand of another hard drive from which it is possible to take advantage of the working system);
- Acronis Disk Director 11 Home, - also not replaceable by us in our right programmatic (in fact, we use its analogues). For additional joy of life, we change the size of the volumes of the disk, and also copy or move the volume of the disk. Whenever you pay for this product, we will help you, marveling more, 30 days freebies;
- ProgDir is a small utility for fixing the registry. Vykoristovuetsya us to this particular type, for the portability of the path installed for the minds of us, we need a place;
- SteamMover, is a small utility for transferring our programs from the system disk to another one (to save practicality);
- Driver Sweeper, is a program recognized for remote drivers, about those who appear on our resource bula okrema articles, it is recommended that you familiarize yourself (available).
Here we are, and with the program of our toolkit we got it. So you can proceed further.
Algorithm, process
Let's start with the description of the algorithm of our activities:
- We take a backup copy of the system from a working person;
- We will be the foundation, so we will create additional folders that will be occupied by other necessary preparation;
- We clean the system, so that we drive everything in, we take browsers and other software, which does not sting;
- Copy or move the system volume;
- Optimize the work of SSD;
- We will install the programs we need;
- We take a backup copy of the working system.
Come on, everything is simple? In truth, everything would be like this, yakby is not the only "ale": far from going ahead yourself, as it was planned. To the skin of the paragraphs, the descriptions below will be reported, and I will try to recognize all the underwater stones that can be taken on the thorny path of vikonann, described above by the algorithm.
Krok 1. We take a backup copy of the system.
Our richness begins to rise more expensively from the creation of the right point to the point that we, as if, by rapt zlamaemo, we can always turn around. For the creation of a backup copy, as it was said earlier, Acronis True Image Home (we won’t think about it on the installation of the programmer’s diva, because it’s easy to finish everything there).
So let's look at the point, if we launch a shortcut on the desktop and already in the program itself, click on the "Backup copies" section, debachimo:
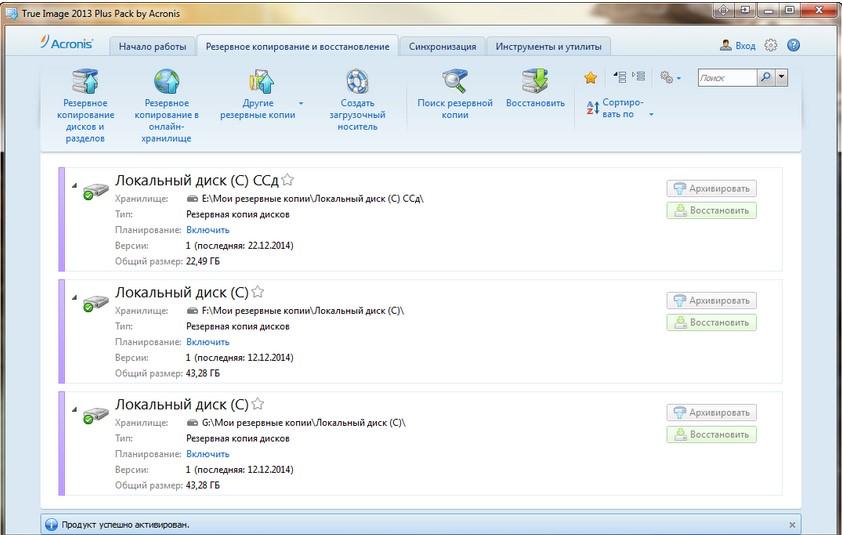
That is, either your old backup copies (on the screenshot), or just an empty space (as you have never created backup copies through this program before).
While checking the completion of the backup copy, you can drink a drink (because you drink or smoke there), and then go to the next point.
Krok 2. We will be the foundation.
Maybe, the simplest point. Vin includes the creation of additional folders (or a dedicated disk volume) for saving our programs.
Zagalom here you vporaetsya yourself. What are you running into? It's so easy, for example, to create two new folders on volume D:\: Program Files 2 and Program Files Old (well, let's use some names that make sense to you).
The first folder is necessary for us to install all new programs there, if we don’t want to save them on the SSD, and the other folder is for those programs that are installed on our computer at once and we don’t want to re-install them in the future bachiti on the SSD-disk.
Zagalom, now, not long thinking, brew more tea and stomp away.
Krok 3. Clean the system.
The axis at this point, my friends, we are "stuck" for a long time. So, well, at the time of moving within the framework of this article, my disk C: \ was 160 GB in size (of which there were three times less than 60 GB), so I had to take the liberty from my hand and start a general uninstallation.
Let's start with a simple one, but with CCleaner itself, as we clean all the clock files and other stuff. If you don’t know, if you want to, then we have a special article for that: "". On top of CCleaner "and you can go through the utilities of the Wise company (article)".

Golovnya doesn’t overdo it here, she doesn’t see the bunny. Posilannya on the material about the program, we guess, it could be on the cob of the article.
Further more. Let's move along the road Control Panel - Software Components And there for a long time + tedious, and also mercilessly three all the programs we don’t need (they are rude, rudely seeming that you haven’t launched ten months, so the programs are not the first need). For my own knowledge, I will say that such a program "smite" can be practical on any computer.

Naturally, it’s impossible to save 45 GB for everything, better for everything (and our meta, at least, for the declared 60 GB SSD is just like that, because it’s impossible to drive a disk again). Ale .. Here we go to our "secret" zbroї, and the miraculous SteamMover utility itself.
The program is completely cost-free, does not require installation and is even easier to manage (div. screenshot below).

It is possible, let's say, to capture the wonder of a programmer's thought. Installation, I repeat, is not needed - just unpack the archives and run the program from this folder.
As for the choice, then in the left part, with three dots, we choose to transfer the stars, and in the right part, with three dots, transfer where.

True, not everything can be transferred without delay, but it is not necessary. For example, browsers and drivers are not better than smart, so all other programs themselves are connected to plugins-extensions and other extensions. It's worth it, let's say, to the office of drіbnom'yakikh (Microsoft) and such important athletes as antiviruses + firewalls. Ale navit iz tsim zamezhennymi having tried not to cheat and nothing constipated, we can achieve good results.
On top of that, as you have shown what is lacking, it’s more, what you can and need to grow, and move it yourself to the work table, my document folders, zavantazhennya and all that kind, well, in other folders on another disk.

I think that with this procedure you can work independently, since you don’t need to build any specific software and you can do everything with your hands, thanks to a working style, zavantazhennya, documents and otherwise miraculously available for your delivery.
If you didn’t get into the target, then you could see it. You can see what you will be.
Ufff .. The axis of the best completion point for the hour and I am sure that everything went well for everyone without any inaccuracies, more than that stage, it is possible to save the axis normal work system, ale .. Aje mi not for nothing made a backup copy for you;)
Krok 4. Copy or move the system volume.
It worked, it didn’t get much, but to itself: the copying / moving of the disk volume was completed.
After installation, as we don't have a great deal for you, we'll launch "Acronis Disk Director 11 Home":

- SSD initialization. If we just connected our accumulator (when the computer was switched off) we are not yet ready to work and the first thing we need to do is initialize. There is nothing foldable here, - just click with the right button of the bear and select the item "Initialization", which did not happen automatically;
- Changing the size of the system volume. It’s even easier to fight: select disk i, select the appropriate menu item, select the required item, and there we already select our volume and SSD expansion;
- Transferring volume. All the same menu is evil, but only once again the next item. Everything is simple, but even more foldable, you can use the screenshots below, though you only need to choose where to move something;
- We are creating a new volume free space on the earlier system disk, or expandable for some additional help, say, the very same D:\ drive.
Screenshots of the process:


From i all. And now we press the Vikonati button on the left upper codend And, having plucked up patience, check it out, because the process is going to be done for a long time. As soon as I can see a pardon, it means that you did get it, if you cleaned the system and, better for everything, bring it up to a backup copy, and then repeat the process a little more accurately.
Krok 5. Optimizing the work SSD.
Wow pratsyuє (yakscho pratsyuє;))!
Do you see how the system began to take advantage of it? It will be better if we optimize the work of our SSD. I won’t tell you why, because it’s already a miracle article on this topic. Read, work and enjoy the result.
Krok 6. Installing the necessary programs.
I think this paragraph does not require comments :)
Krok 7. We take a backup copy of the working system.
Well, dear friends. You went through this difficult path with me (let it be for someone, it’s possible, it’s possible to lose your visibility), and for that we only had to fix the result of the backup copies of the system, so that you could fire it up in a working camp without a twisted body .. Well, ah how tse robiti, you already know.
Let's write a letter;)
Pislyamova
I guess, I still want to say that:
- So, it was foldable for someone;
- So, it was wonderful;
- So, the price was long, it is possible that for rich people the price was very low, and pardons.
Ale, don’t say it, it’s still cool.
Even so, I’ll let you know, I’m sure, everyone understood that you can take it and install it from scratch, but, better for everything, it would be richer simpler and less costly from the side of the nerve and the hour. From the other side, we don’t start shackling light and simple paths, so that in the process we’ll take it, we’ll get an irreplaceable acknowledgment and so on.
I’m sure that this article was corny to you, even if it’s a collection of “skidly-brown joys”.
On tsoma, mabut, mustache. Thank you for the added respect and, traditionally, as well as food, thoughts, additions and so on, we kindly ask you in the comments before this entry.
PS: For the reason for the status of a member of the team under the nickname Harry_Sol. For the time being, please don’t judge too harshly, because the first material for the new one is better, because we have more good ones on the new rollers, but you marvel at the new writer;)
After a few years after leaving the masses, solid-state accumulators took their place in the computers of coristuvachis.
І tі z koristuvachіv, yakі їх they buy it again and ask “how to transfer the system from HDD to SSD”.
Aje for this similar show and recognition: through the presence of mechanical elements, the exchange of data in a solid-state drive will reverse this show in the Winchesters, and sometimes on a whole order.
Why is it better to use a solid-state accumulator?
Reasons to install operating system on the SDD a sprat, but the head one is the transfer of which accumulated over the HDD for a speed indicator.
SSD to bypass whether it’s a modern hard drive with security read-write information, which is even more important when Windows startup, corystuvac dodatkіv the same as timchasovyh files.
Also important: the presence of mechanical components, which are positively affected by noise temperature regime.
The price is significant, the capacity is small, the number of operations is limited, the record before the exit is in the middle of the memory of the fret, and the hour is energy boost(in case of HDD pairs) through permanent defragmentation of files in the background - the negative side of files digital information.
As far as obsyagu is concerned, then operating the SSD is less like a system volume, more coristuvachiv as a whole is sufficient for a disk with a total volume of three more than 64 GB. And to stand still a little єmnі pristroї zovsіm inexpensive.
Let's figure out how to move Windows by ourselves in a simple way. On the right, in what Microsoft propagates ingenious utilities and a language of uncommon instructions. Let's move on more easily by using the Migrate OS utility like Paragon.
Please! The presence of a given volume (drive C: as a rule) for saving Windows and add-ons with їx and other dannym significantly forgive the task. Well, the Winchester is not broken (on a new one, it was only split), the number of manipulations and the complexity of the process will not be easy to clean up the Winchester from system information.
A short guide to migrating Windows to a hard drive
- Purely systemic distribution of information, so as not to lie too much necessary.
- We create a backup copy of the actual OS as needed.
It’s not worth fighting through, because the migration procedure itself is not safe (it’s necessary to spend a little bit more information than zero), but so, about every fluctuation.
Look, turn, they are different, and to be safe once in a good time, all the same, next.
Speed up with Acronis Home edition True Image software. She’s going to do everything at the kіlka klіkіv (reporting instructions for newcomers are given below).
- Migrate system files for help Migrate OS to a new solid state drive.
Now let's look at all the steps of the instruction report.
Purification
This includes the removal of non-essential and unimportant information for speeding up the process of transferring, changing the size of the distribution kit and speeding up the OS.
Another stage is the uninstallation of rare tricks and "important" programs through the Control Panel or "Remote Programs" from the "Service" branch of the fortune-telling utility.
It will be shorter, as before transferring, it will be free of software, which is rarely launched in the region, and programs that take up a lot of space, like packages for modeling, compositing and video processing.
Bazhano pozbutissya all corystuvac files that take up a lot of space (often people save movies and other data on the work table through good access to them).
Chergovy stage - a search and correction of problems at the registry.
Tisnemo "Registry" -> "Search for problems", then - "Correct". Confirmation of names and also about every change, we reserve the keys that we see.
The final stage is the search for spyguns, viruses and other non-buggy software for additional antivirus and / or anti-spygun.
Reservation
It is considered a classic option, if Windows is chosen for a different distribution, on the True Image edition of 2017. For the purpose of aiming for a cost-free solution, you can beat it, and we will refer to the distorted software in the form of informational retailers.
1 Capture True Image.
2. Start up and press "Entire Computer".
3. It’s possible that the reservation was reserved “The disks were distributed”.
4. Visually new translation computer volume
6. Set the path, how the image will be saved, and start the process.
Whom's preparation is over. You can transfer it with the help of True Image, but the process is even more laborious.
Porting to a solid state volume
Migrate OS to SSD is a highly specialized utility, recognized as the only one for migrating OS from a hard drive to a solid state drive, and nothing else is suggested, everything is simple here, it’s easy to understand. The utility is requested:
- select old Windows;
- Indicate the necessary folders with the documents of the correspondent, including non-essential ones;
- vykonati virіvnyuvannya new rozdіlu yogo rozmіtku for more efficient operation.
The use of technology for sector-by-sector copying automatically transfers reservations by the distribution system without unnecessary clicks.
1. Get the utility from an official resource for the address or from the Internet with a cracked version, as it can and will appear quickly (for download only from the twisted dzherel, on the kshtalt torrent trackers).
Respect! The addendum is paid and for the new one you will have to pay 790 rubles. As a matter of fact, about a hundred dollars were already charged for a new accumulator, and another ten dollars for the program were not guilty of a lump in the throat.
2. Install software.
3. Run the utility.
4. At the first vіknі click Next, after reading the row about those that the information on the whole volume (SSD) will be seen.
5. The next thing you need is a little bit of kidney, while the program analyzes the possession.
6. As it is necessary to switch on whether it is copying, press on force: "Be kind, choose ...".
7. We take the right proportions from non-required directories, for example, the Robotic style, that data is given to the swap file, deactivating this function in the front (then you can turn it back on, and it’s better to transfer pagefile.sys to the back).
Solid-state accumulators SSD win over the best magnetic accumulators for rich parameters - swidcode, resistance to low-density, etc. Itself on the SSD is recommended to carry out the installation of the operating system and rich powerful programs. Ale scho robiti, as the OS is already installed on the old magnetic accumulator?
One of the handy options I'll update it, and then put it on a new SSD. However, this option will not work for that person, as everything is already set up in the OS comfortable work. Fortunately, the operating system can be transferred from one disk to another.
About the transfer process
It’s also bad, so that such a mind was taken up: the size of the SSD-disk, on which the OS is transferred, is not guilty of the smaller one for the disk on which it is installed. Luckily, if your OS was on a 1 TB HDD, then it’s not necessary to buy a 1 TB SSD.
Method 1: AOMEI Partition Assistant
Take a closer look at the transfer from the butt of a third-party utility. AOMEI Partition Assistant - price free software security for robots with disks and files on the computer. The interface is simple and handy. Russian language.
The transfer of the operating system is subject to the next instruction:
- The utility may have its own distribution of a kіlka mastrіv, leather from some kind of imprisonment for a song. In this situation, you will need "Migrate OS SSD or HDD". Vіn raztashovaniya at the left menu at the vіknі Maistri.

- See in the end, de you will be shown short description maistri, as well as a sprat of buttons dії. Moved to "Dovidka", you can see more information robotic master. To continue the work, press "Dali".

- Now I will transfer you to the window, de order to select an SSD drive. Please understand that the disc may not be visible for your mind, that there are already recorded files on it file system. At this time, you will have to clean up the accumulators again, otherwise the utility will not work. Everything is good, choose the accumulator and click on "Dali".

- In the coming future, it will be proponated to split the disk on the next partition (for example, on disk C and D). You can not change anything here, otherwise the system will be written to disk without any breakdown. If you need to work out the breakdown, then lie, that the expansion of the possible disk C is not to blame for the smaller one, the lower one for the current one. Rosemary roses are nailed at special fields.

- After the manipulations due to the changes, please wait ahead, de bude it will be written about the possible problems due to the changes in the OS after the transfer. As a solution to these problems, the program will try to remove the old HDD, and then try to take over the system again. If you don’t see anything, you are also advised to put an SSD in the space of the old disk. As soon as you become familiar with the advances, press "Kіnets".

- To start the process of transferring the OS to another disk, click on the green tick icon, ticked at the top left part of the window.

- Seen in the window with the list of operations. To start the process, press the button "Jump".

- One more time to come out of the front. Here you need to choose "So". In this rank, you confirm your actions. The computer will be reset and the process of transferring data will be revealed. Yogo trivalіst povnіstyu fallow the characteristics of the computer, zhorstkogo that SSD drive iv.

- If the process is completed, the computer will restart again. If you want to get the OS on the HDD more often, then take it out for an hour. After transferring to an old magnetic disk, it is necessary to delete the operating system (it is necessary to format the disk again).

Method 2: Standard Windows utility
Starting with Windows 7, you can move the operating system from one disk to another, more vicarious system than the system itself. How do you have more old version Windows, then you may need to use third-party utilities.
The process itself can be mentally subdivided into three stages:
- A backup image of the OS is created with the help of data and upgrades.
- The image is recorded on a special zavantazhuvalny hoarding machine. Otzhe, you need okremiya nakopichuvach. Bazhano vikoristovuvati for this flash drive. Oskіlki rozmіr sistemy all at once system files and programs on disk C can take a few dozen GB, it is recommended to use flash drives with a maximum capacity of 16 GB.
- Transferring images from a flash drive to an SSD.
Now let's move on to more reporting instructions for the first step:
- For the cob go to . Vіdkriti її can dekіlkom in ways, for example, through "Start".
- Put opposite here "Review" meaning "Beyond the categories".

- Select item , what to know in the block "The security system".
- At the left part of the wrap "Creation of the image of the system".

- Now choose your nose, where it will be recorded Windows image. If you don't have a local flash drive or a DVD, you can record on a local system disk, for example, on disk D. After choosing a place for saving, press "Dali".

- You can choose which disk to archive. The lock will be assigned C and system reserve. You don’t need to choose anything, press it "Dali".

- Have a new vіknі vіknі vоbachit vіdі vіknі vіknі і vіbіtі vіdі vіdі schodo arіvаtsії. You only need to confirm it by pressing the button "Archive".

- Show up at the window "Creation of the image of the system". Here you just need to press on "So".

- Dock the end of the recording and move on to the next stage.
Now we will not create an exciting hoarding machine, so that later we could open the menu of the operating system:
- I want to go to and select an item there "Computer data archiving".
- Now choose from the left menu "Create System Update Disk".

- Vіdkriєtsya vіkno, de you are instructed to select a disk drive with a disk already inserted for recording. Since the design of a computer / laptop does not transfer visibility to a new drive, then you will not be able to create an exciting nose in such a way.

- Everything is fine, the system is writing the image to the original DVD. However, if you have any information on your new one, it will be removed. Ale on the old ones Windows versions the system will simply remind you about the need to erase data from the disk.

- If you yourself have such a temper, then go to "My computer", find the required DVD there and right-click on the mouse. At the menu that blew, click on "Erase this disk."

- Let's turn to the folding of the hoarder. At the stage, it was necessary to select a disk (3 clicks) to press on "Make Disc". Dock the end of the process.
Let's move on to the final stage:
- Reseat your computer and go to « boot menu»
. Most of the vipadkivs vociferously call out to the onslaught Esc. Here it is necessary to select that disk, which is the image of the operating system.

- The Windows installer will start. Select language and press "Dali".

- Scattered around, they wrote down the image of the system update, then the replacement of the OS installation, the installer later searched for the already installed operating systems. Dock your yoga ending.

- Now check the box next to "Innovation of the computer for help behind the created image of the system". If you have a small number of operating systems on your computer, choose the one you would like to transfer. Press "Dali".

- In the upcoming future, you will be asked to choose an image, from which the system will be inspired. Sound the blame already for you, it’s easy to press "Dali".

- Here you can get acquainted with short information about the task dodatkovі nalashtuvannya. Incompetent short-lived PCs are best not to go anywhere and just press on "Dali".

- In the rest of the week to see technical information. To start the data transfer process, press "Dali". The process of transferring may take a few years.

Within the framework of this article, two main ways of transferring system information from magnetic disk on an SSD. You can choose the most convenient for yourself, so that insulting ways can be practiced on any computer.
Do you know how to transfer Windows from your HDD (hard drive) to a solid state accumulator SSD. Є faceless programs for Windows porting, for example: Acronis True Image, Paragon Migrate OS to SSD, Paragon Home Expert and AOMEI Partition Assistant Home Edition and many others.
 Let's take a look at the simplest way to migrate Windows from HDD to SSD using additional software Paragon Migrate OS to SSD from the butt of Windows 7.
We go to the official website and download the program for a fee, or you can download it free of charge from torrent trackers.
Creation of divisions on disk
 Also, go to the disk management panel of the computer, as shown in the application of the picture, є HDD - hard drive size 250 GB of partitions into two partitions, on the C drive: Windows OS. Moveable to SSD - 120 GB solid-state storage with unlimited space.
 Before you transfer Windows to the required one, you have divided it on the disk to which you want to transfer the OS. Press with the right bear on that disk, on which one chooses to create a split and choose " Create a simple volume".
 Dali.
Dali.  There is nothing here "Dali".
  There is also "Dali".
 It's done. We wrote a report on the way of creating divisions in an okremіy statt.
 Migrate Windows from HDD to SSD for help Paragon Migrate OS to SSD
 Starting the program Paragon Migrate OS to SSD"Dali".
  Choose a solid-state storage device "Dali".
Give respect to the point Vykoristovuvat all available space for OS distribution If you select this item, then your operating system will borrow all the available space on given disk And you won't be able to create other files on this disk later.
If you have a larger SSD drive, more than 120 GB, and you split the drive for distribution, then you can ignore this item. For small volume disks, it is better to use the entire available space for the OS, but there is no sense to extend the disk with a small volume for distribution.
 Set the format item and press "Dal".
  Starting to move Windows to an SSD drive. The process of this long time will happen to troch zachekati.
  The Windows porting procedure has been completed.
How to get the axis that we had Windows successfully transferred to a solid-state storage device.


